
Copper taxes every meter, and low voltage pays double
Every conductor has resistance, and current through resistance drops voltage as heat. Low-voltage systems suffer disproportionately: the same one-volt loss that no 230 V circuit would notice is eight percent of a 12 V rail and twenty percent of a 5 V one — visible as tail dimming, warm-white drift, and controllers browning out at full command. The arithmetic below turns that physics into a wire size chosen before installation, not diagnosed after.
Two facts anchor the calculation. Current, not watts, drives drop — which is why 24 V systems (half the current for the same power) tolerate distance so much better, and why full-white RGB is the load to design for. And distance means the round trip: current flows out and back, so a supply four meters from a strip pushes through eight meters of copper. Both mistakes — designing for average load and one-way distance — flatter the wire size by half.
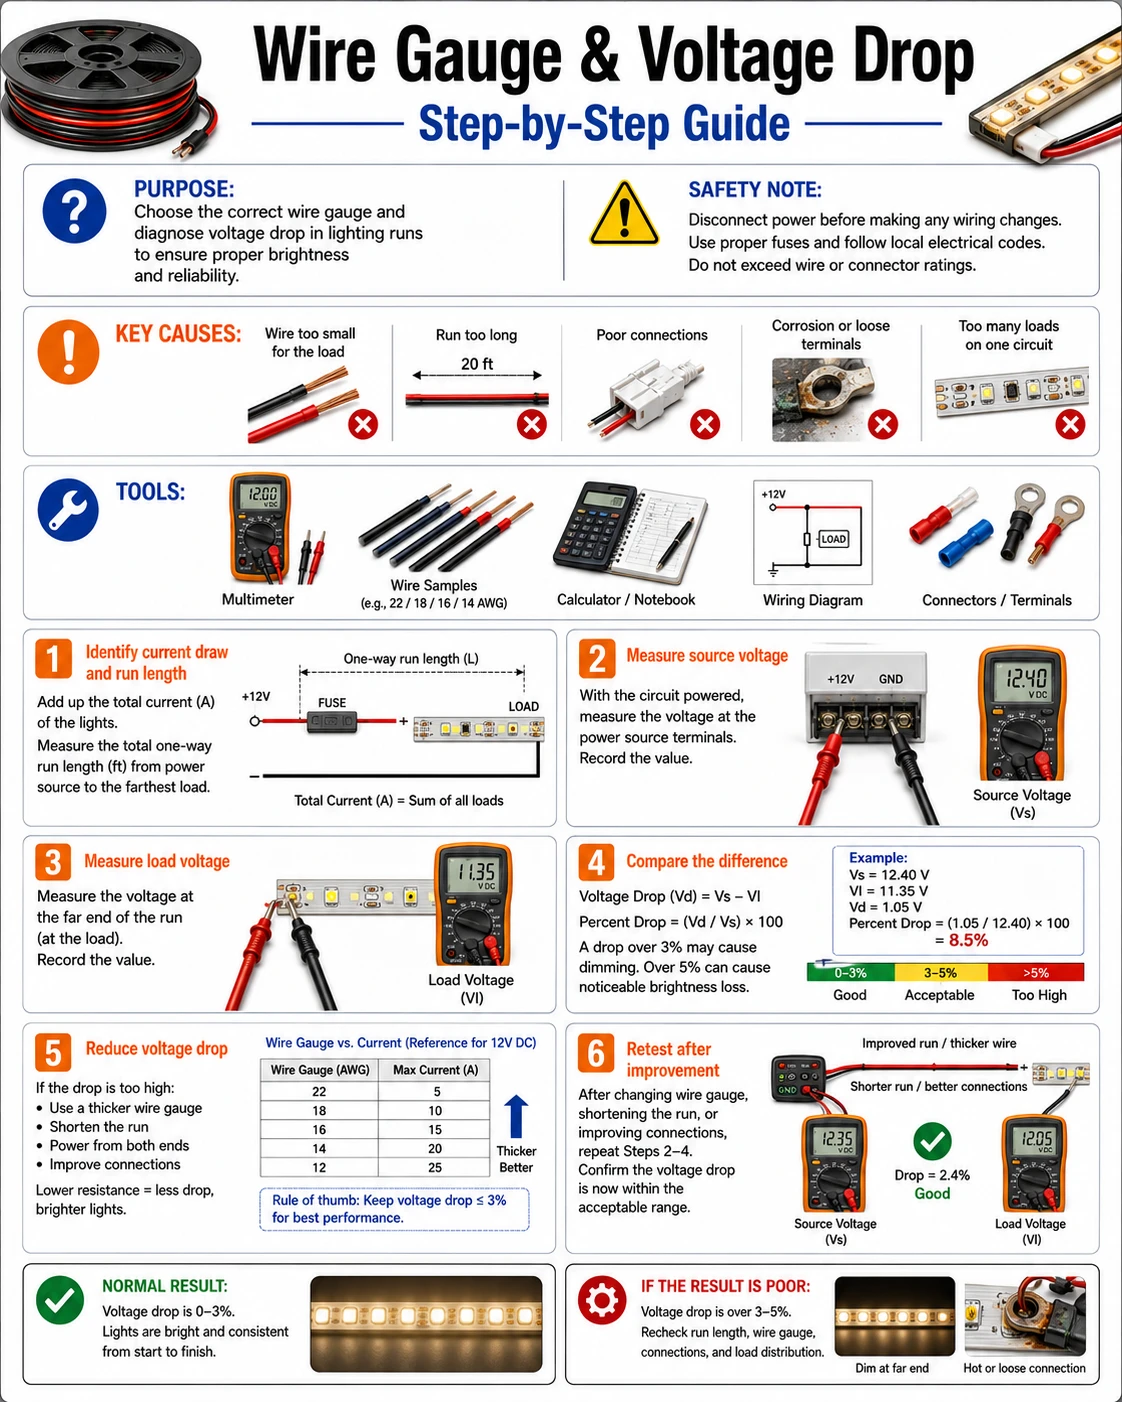
Prepare before testing
- Calculator and the run's real measurements — current from the supply-calculation guide, distance along the actual routing
- A wire gauge chart (AWG or mm²) — resistance per meter per size — printed on most spool listings
- Multimeter — the head-and-tail audit under full load is the proof the table cannot give
- Ferrules or quality crimps for thick wire — heavy gauge is pointless behind a starved terminal connection
Undersized feed wire is a heat problem, not just a brightness one — a thin lead at full current warms along its length, in trunking, under carpets. Sizing generously and terminating properly is fire-margin, and connectors must be rated for the same current the wire carries.
Check these areas first
- Tail dimming and warm drift. the strip's far end pays the drop; blue dies first and white turns warm
- Bench-fine, installed-dim. the install added meters of thin feed wire the bench test never saw
- Feed wire warm to the touch. the dropped volts became heat in the copper — the same fact by another sense
- Controller resets at full white. supply-side drop browns the controller out exactly at maximum command
- Extended runs on original wire. a spur added to a working system re-runs everyone's arithmetic, invited or not
Diagnostic procedure
Current first, honest distance second, a drop budget third — then the gauge falls out of the chart, the connectors get checked against it, and the meter audits the result.
Establish the design current
Take the margined full-white current from the supply-calculation guide — the worst case the wire must carry. Spurs and future extensions ride on the same feed: include them now. Everything downstream of this number (gauge, connectors, fuse) inherits its honesty.
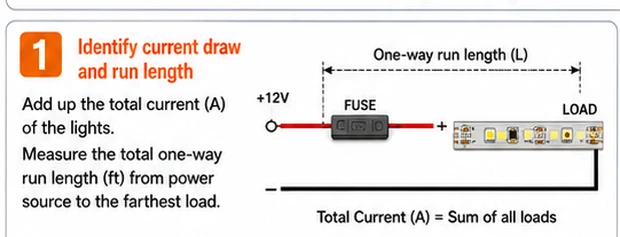
Measure the true round-trip distance
Measure the feed's actual routing — around the door frame, up the cabinet back, through the trunking — not the room's diagonal. Then double it: out and back is the circuit the electrons run. This doubled figure is the length the chart wants, and skipping the doubling is the most common way calculated systems still dim.
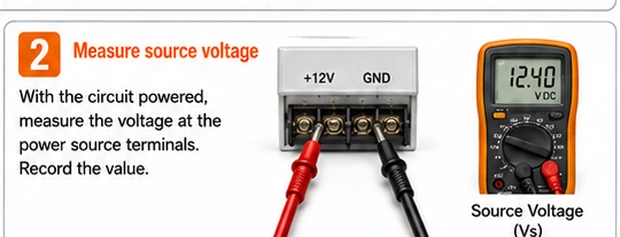
Set the acceptable drop
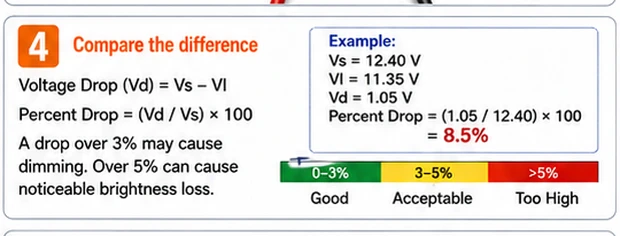
Pick the budget: 3% of rail voltage for quality-critical runs (0.36 V at 12 V), 5% as the everyday ceiling. Tighter budgets suit long white runs where tint drift shows; 5% serves most accents. The budget is a decision, not a law — but decide it before the chart, because it is the denominator of the whole selection.
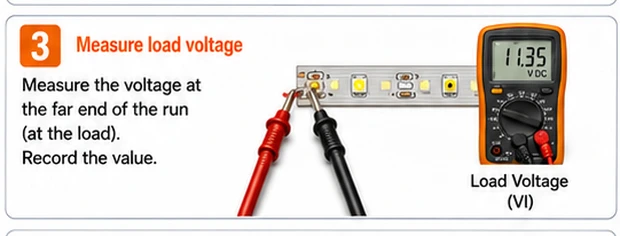
Select the gauge from the chart
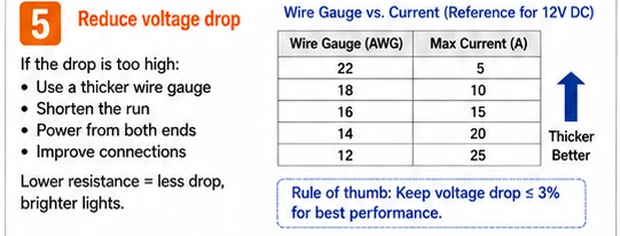
With current, round-trip length and budget: read the chart for the size whose resistance keeps I × R inside the budget — or compute directly from resistance-per-meter. Between sizes, round up; copper's price difference is trivial against re-pulling a wall run. High ambient temperatures and bundled routing argue another size up.
Match the terminations to the wire
A heavy feed crimped into a connector rated below the design current recreates the bottleneck at a point — with heat concentrated there instead of spread along the run. Check every junction the current crosses: barrel plugs, screw terminals, clip connectors. Ferrules on fine-stranded heavy wire make screw terminals grip honestly.
Audit with the meter under full load
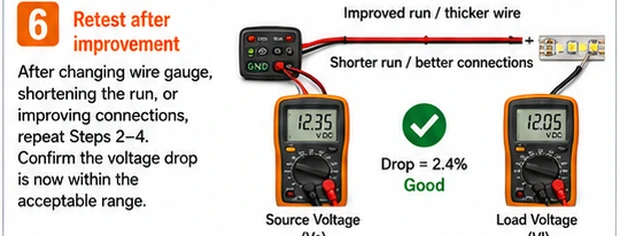
Installed and running full white: measure at the supply terminals and at the strip's head; the difference is the feed's actual drop — compare against budget. Measure head versus tail on long strips for the strip's own internal drop, which injection points cure (the partial-off guide details them). Numbers inside budget close the project; a gap names the segment that lied.
Why voltage choice is the biggest gauge decision
Doubling system voltage halves the current for the same wattage — and drop scales with current while the budget scales with voltage, so a 24 V system tolerates roughly four times the run of a 12 V one on identical wire. Planning a long kitchen, stair or perimeter run, the cheapest 'thick wire' is often choosing the 24 V strip family at purchase time: thinner feeds, fewer injection points, cooler connectors, one arithmetic pass instead of three remedial ones. The 5 V addressable families sit at the opposite pole — wonderful pixels, brutal drop — which is why their long installs lean on frequent injection as a way of life.
Two tools for the same physics
Feed-wire gauge fixes the supply-to-strip leg; it cannot help the drop inside the strip's own copper. Long strips need power injected at intervals — fresh feed pairs from the supply to mid-run and tail points — effectively shortening every internal leg. The practical split: gauge solves runs where the supply is far from a modest strip; injection solves long strips wherever the supply sits; big installs use both, calculated with the same I × R honesty. When tail dimming survives a generous feed upgrade, injection was the missing half — the arithmetic simply moved inside the strip.