
Command path first, execution path second
A controller's job has two halves: receive an instruction (button press, IR flash, RF packet) and execute it (drive the string's channels in a pattern). Users experience both failures identically — 'the button does nothing' — but the halves test differently. Lock modes, dead remote batteries, blocked IR windows and stuck buttons all kill the command path; water damage and burnt output channels kill execution while buttons dutifully beep and LEDs on the box still blink.
Two cheap facts accelerate everything: many controllers have timer and lock states that survive power cycles and look exactly like a fault; and a phone's front camera sees infrared, so a remote's emitter can be watched flashing — or not — in ten seconds, settling the 'is it even transmitting' question that otherwise burns an evening.
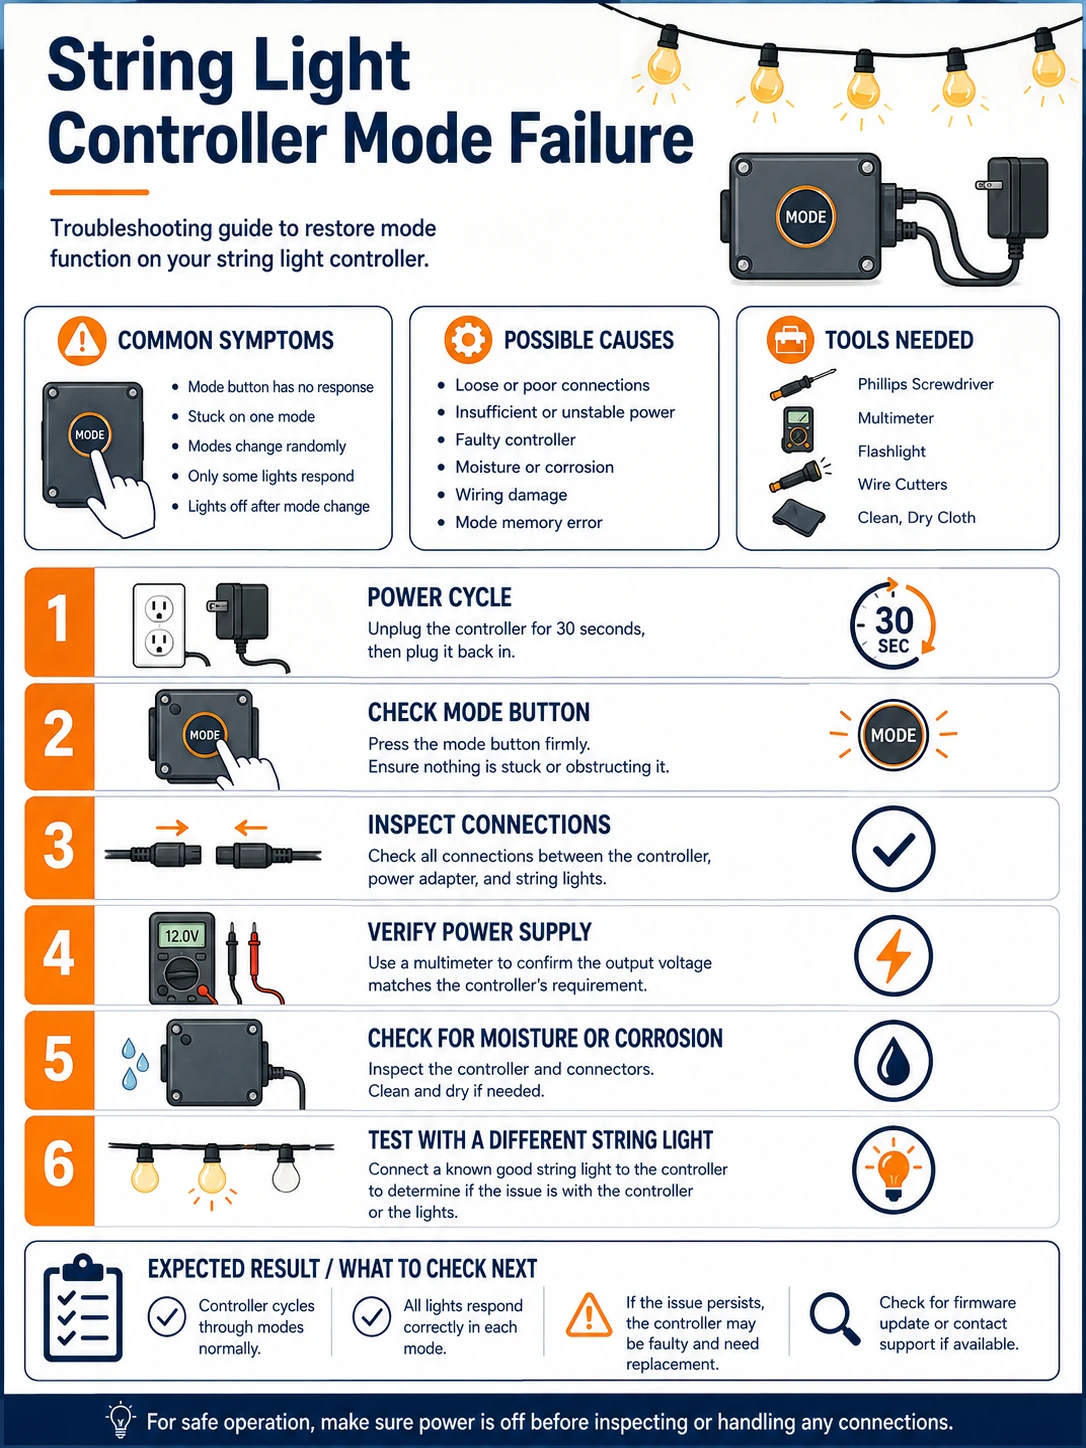
Prepare before testing
- Fresh coin or AAA cells for the remote — the correct type, plus a check that the factory insulating tab is out
- A phone with front camera — front cameras usually lack IR filters and show remote flashes on screen
- Isopropyl alcohol and swabs — for cleaning the IR window and a sticky button membrane
- Multimeter — to confirm the controller's input supply before condemning its brain
Work unplugged whenever the case is open. Mains-input controller boxes (rare, but they exist on older sets) are not for opening at all — low-voltage boxes fed from an adapter are fair game.
Check these areas first
- Timer or lock state engaged. a 6-on/18-off timer or child lock mimics a dead controller on schedule
- Remote not transmitting. flat cell, un-pulled insulator tab, or corroded contacts silence the IR emitter
- Blocked or dirty IR receiver. the receiver window buried behind a bookshelf or fogged by weather sees nothing
- Button membrane failed. water or wear leaves the button spongy, stuck, or permanently pressed by a warped case
- Output or logic failure. supply present and commands acknowledged, yet modes never change — the chip or a channel driver has died
Diagnostic procedure
Clear the states, prove the remote transmits, prove the receiver can see, exercise the button, then and only then judge the silicon — with a supply measurement before any verdict.
Cancel timer and lock states first
Hold the mode/power button for five to ten seconds, then power-cycle by unplugging (not just app-off) for thirty seconds and retest. Consult the label or manual for the set's timer combo — commonly a dedicated timer button or a long-press — and deliberately cancel it. A controller that revives exactly 18 hours later was never broken; it was scheduling.

Service the remote's battery honestly
Open the remote, confirm any clear plastic isolator tab is fully removed, and fit a fresh cell of the marked type, clean side to the correct pole. Wipe the contacts. Weak coin cells produce the classic near-fault: the remote works only at point-blank range, which misleads the diagnosis toward the receiver.

Watch the remote transmit through a phone camera
Point the remote's emitter into your phone's front camera in a dim room and press buttons: a working IR remote shows a white-purple flicker on screen with each press. Flashing remote plus deaf controller moves the fault to the receiver side; no flash with a fresh cell convicts the remote itself — replacements are cheap and generic for many sets.

Give the receiver a clear, short path
Find the receiver — a small dark window on the box or a bead on the wire — clean it, and clear anything between remote and window: décor, tinted covers, sunlight flooding the sensor. Test from under a meter away, aimed directly. RF remotes skip line of sight but still fail on distance and interference; re-pair per the manual if behavior is erratic.

Exercise and inspect the physical button
Press the mode button through a full slow cycle, feeling for a crisp click versus sponge or a button that never returns. Unplugged and opened (low-voltage boxes only), look for water tracks, a warped case pressing the membrane, or grime under the pad; clean with alcohol and reseat. A button held down by its own case explains both no-response and modes that change by themselves.

Measure supply and judge the output stage
Meter the controller's input under power: stable voltage at its rated level clears the supply. If commands now clearly register (a beep, a blink, an app acknowledgment) but the string's behavior never changes — or every mode renders the same — the pattern chip or a channel driver has failed. Controllers are sealed commodity electronics: match voltage, connector and channel count, and replace the unit.

The multi-channel cousins
Firework lights, meteor tubes and motif frames run multi-channel controllers where each output feeds one arm or segment, and their signature fault differs: one arm dark or one segment stuck while the rest animate. That is a single failed channel or its connector — swap the suspect arm onto a known-good output to decide between arm and channel in one move, exactly like any branch test. Whole-pattern failures (everything frozen in one state) belong to the same command-versus-execution logic above; multi-channel boxes simply raise the stakes on matching the replacement controller's channel count and sequence order, since a generic swap that fits electrically can still play patterns in the wrong arm order.
Buying the right successor box
When the verdict is replacement, carry three facts to the purchase: input voltage and connector type, channel count (two-wire static, three-wire chasing, or addressable data), and whether your string expects a specific protocol — addressable sets are dialect-sensitive. Photograph the old box's label and plug before it goes in a drawer. A mismatched 'universal' controller that powers up but plays garbage costs more evenings than the original fault did.