
Charge by day, trigger at dusk — two systems, either can fail
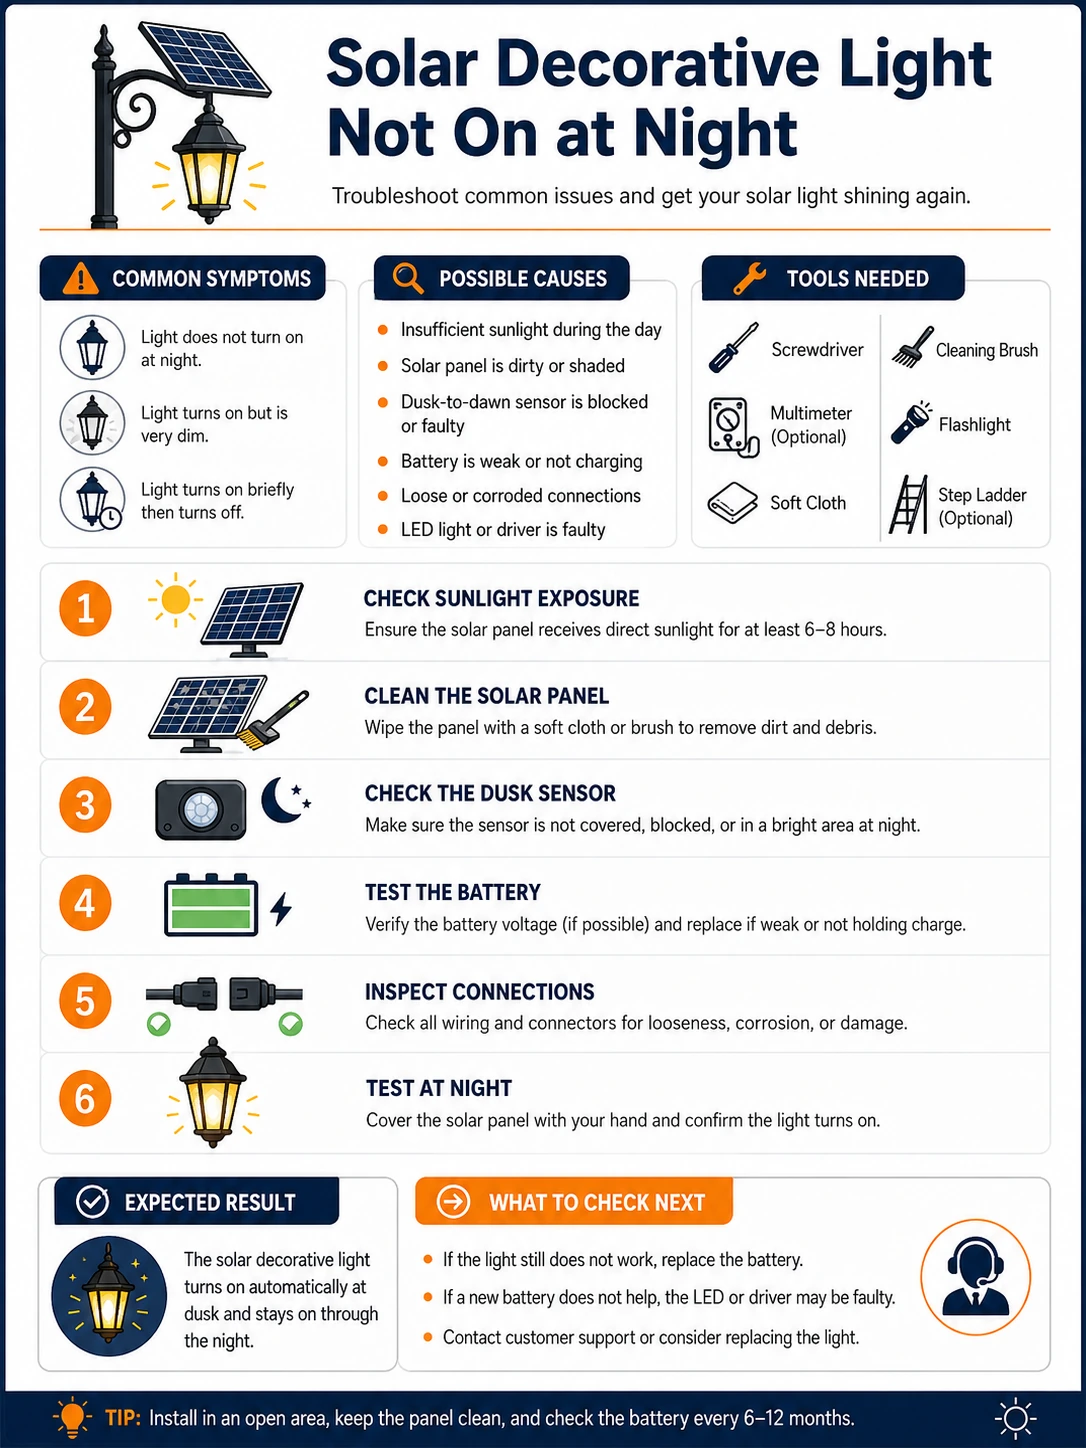
Every solar light couples two subsystems: charging (panel → battery) and triggering (the panel doubling as a darkness sensor). A unit that never lights might have charged nothing all day — dirt, shade, a dead cell — or might be charged but never 'see' night because a streetlamp, porch light or even a neighbor's window keeps the panel above its darkness threshold. The tests below separate the two cleanly.
Age expectations belong in the diagnosis: the NiMH or lithium cell inside is a consumable rated for a few hundred cycles — two to three years of nightly duty. A unit from several seasons ago that fades minutes after dusk has a tired cell, not a mystery; the fix is a matched replacement cell, and it rejuvenates the light for the price of a coffee.
Prepare before testing
- Opaque cloth or cardboard — fully covering the panel simulates night on demand
- Fresh matched rechargeable cell — same chemistry, size and capacity class as the original — the definitive battery test
- Multimeter — cell voltage before and after a sunny day tells the charging story
- Fine sandpaper or a fiberglass pen — for greening battery terminals and spring contacts
Replace cells only with the same chemistry the unit specifies — a lithium cell in a NiMH charger (or vice versa) is a genuine fire risk in a sealed plastic head. Disposable alkalines never belong in a solar light.
Check these areas first
- Master switch OFF. many units ship OFF, and cleaning or a curious child toggles others
- Panel light-starved by day. dust film, snow, or a summer's plant growth shading what was a sunny spot in spring
- Panel light-polluted by night. a porch lamp or streetlight holds the sensor above its dusk threshold
- Corroded battery contacts. sealed heads still breathe; springs green over and the circuit opens
- Cell aged out. a few hundred cycles is the design life; capacity fades to minutes, then nothing
- Broken panel lead. the thin wire from panel to board fatigues where the head was twisted during install
Diagnostic procedure
The switch, then the fake-night test, then light by day and darkness by night, then contacts and cell — each step is a minute, and the sequence rarely needs all six.
Find the switch and set it ON
Check under the head or inside the battery compartment for a switch or pull-tab; set ON and give it a few seconds. New units ship with an isolating tab under the battery that must be pulled. This step closes an embarrassing share of cases and costs nothing but a look.

Fake night with the panel covered
In daylight, cover the panel completely — opaque cloth, folded cardboard, wrapped tight so no light leaks under. Within about thirty seconds a healthy charged unit lights up. Light on cover-up means charging and triggering both work, and your real problem is nighttime light pollution at the install spot. No light sends you onward.

Audit the panel's day and night conditions
Clean the panel — dust film, pollen, bird droppings, snow — and check what shades it now: the shrub that grew, the umbrella that moved. Then check the site at night for spill from porch, path or street lamps bright enough to read the panel; if the panel sees 'day' all night, the light never triggers no matter how charged.

Open the battery bay and restore the contacts
Switch off, open the compartment, remove the cell, and inspect terminals and springs for green or white bloom. Sand contacts to bright metal, check the spring still presses firmly, verify polarity against the moulding, and refit. Moisture found inside also wants the seal or O-ring checked before closing.

Test or swap the rechargeable cell
Measure the cell after a sunny day: a NiMH cell resting far below its nominal 1.2 V (or a lithium cell below ~3 V) is exhausted or the charging path is dead. Fastest resolution: fit a fresh matched cell. Full brightness that night confirms the old cell; still nothing shifts suspicion to the panel wiring.

Inspect the panel-to-board wiring
With the head open, follow the two thin leads from panel to circuit board: look for a broken solder joint, a wire fatigued at the head's swivel, or corrosion at the board. Measure the panel in sunlight — several volts on DC confirms the panel; zero from a clean panel means the lead or joint, repairable with a drop of solder.

Where solar lights actually work
The unglamorous truth of solar decoratives is placement: a panel wants hours of direct sun and a night of honest darkness, and gardens offer fewer such spots than catalogs assume. North walls, deep eaves and winter sun angles starve charging; porch lights and motion floods sabotage triggering. Before condemning hardware, spend one day with the unit relocated to the sunniest, darkest-at-night spot available — units 'fixed' this way outnumber genuinely broken ones in most gardens.
Keeping a path of them alive cheaply
Solar lights fail as a fleet on battery schedule: cells bought together age together. When the first unit dims, buy matched cells for the batch and swap them all in one afternoon — staggered one-by-one replacement wastes trips and leaves the path patchy for a season. Twice a year, wipe panels during garden cleanup; that thirty-second habit is worth more runtime than any premium unit upgrade.