
Height buys evenness at the price of intensity
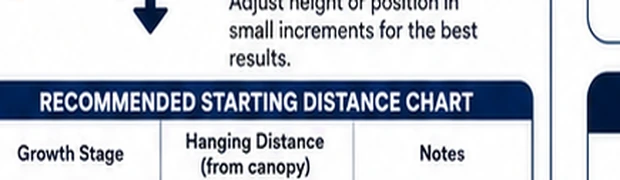
Physics sets the trade: hang lower and the center intensifies while edges fall off a cliff; hang higher and the footprint widens and evens out while peak intensity drops. Every 'right height' claim is a chosen point on that curve for a given fixture and growth stage — which is why the maker's height chart for your specific model beats any universal number, and why seedlings, veg and bloom each want a different hang.
Coverage claims deserve translation: a light 'covering' a given footprint usually means flowering-grade intensity over a smaller core and veg-grade toward the edges. Plants report the truth over days — stretching and leaning toward light says under-driven, taco-curled or bleached center leaves say too close — but the grid method below reads the same story in minutes instead of weeks.
Prepare before testing
- Tape measure — canopy-to-fixture distance is the primary control variable
- A PPFD app or quantum meter (optional) — phone apps are rough but consistent — fine for mapping relative evenness
- Masking tape and marker — grid points on the tray edges make readings repeatable week to week
- The fixture's height/intensity chart — the maker's own numbers for your model anchor every decision
Mind the hanging hardware, not just the light: ratchet hangers rated for the fixture's weight, carabiners closed, and cords dressed so height adjustments never tug a live connector.
Check these areas first
- Edges starving. spindly, stretching border plants under a light hung for center intensity
- Center bleaching. pale, taco-shaped upper leaves directly beneath a fixture hung too low
- Canopy outgrew the hang. plants rose, distance shrank, and last month's perfect height became this month's hot spot
- Single light asked to cover a multi-light area. no height fixes a footprint mismatch — that is a layout problem
- Mixed heights in one tent. tall and short plants under one flat light cannot both be at the right distance — risers under the short ones fix what the hanger cannot
Diagnostic procedure
Grid, measure, compare, adjust, overlap if multi-light, and re-visit weekly — a loop, not a one-time setup.
Lay a measurement grid over the growing area
Mark five to nine points: center, corners, and edge midpoints of the actual planted footprint (not the tent floor). Tape-and-marker labels on the tray rim keep the points identical for every future pass. All judgment that follows compares these points against each other, so their consistency matters more than their number.
Record the current hang honestly
Measure vertical distance from the fixture's LED plane to the average canopy top — not to the pot rim or the floor. Note the fixture's dim level too, since height and dimming trade against each other. Photograph the setup; the record turns next week's adjustment from guesswork into a controlled change.

Read the grid — with a meter or with the plants
With any PPFD meter or app, log each grid point at canopy height, same orientation each time. Without one, read the plants: internode length stretching at the edges, leaves leaning inward, pale or curled centers. Either way the product is a map of relative evenness — the center-to-edge ratio matters more than absolute numbers.
Adjust height against the maker's chart
If the center is hot and edges adequate: raise, in small increments, re-reading the grid each move. If everything is weak: lower toward the chart's recommendation for your growth stage, watching the center for stress over the next days. One variable at a time — height or dimmer, never both in one change.
Overlap footprints in multi-light layouts
Two or more fixtures should be spaced so their edge zones overlap — each light's weakening border reinforced by its neighbor's, producing flat coverage where a single light's edge would starve. Corners of the room want light aimed or shifted toward them; the grid's corner points referee the spacing debate with numbers.

Re-measure on a weekly rhythm
Plants close the distance to the fixture every week; the perfect hang decays on its own. Put a weekly grid pass (or even just the tape-measure check) on the same day as feeding: raise the light to restore the target distance, confirm one or two grid points, done in five minutes. The routine is the placement — the initial setup was just its first iteration.
Sizing the layout before buying the hangers
The coverage question — 'is one light enough for this area?' — is answered before any height tuning can help. Compare the maker's flowering-footprint (not the marketing footprint) against the planted area: a fixture rated to flower a given square honestly covers roughly that square at its chart height, and edge zones beyond it are veg-grade at best. Stretching one light over too large an area by hanging it high buys evenness while dropping the whole map below useful intensity — the grid will show flat-but-weak everywhere, which no height change fixes. That reading is the purchase signal for a second fixture (or a smaller footprint), and catching it in week one is precisely what the first grid pass is for.
One fixture, three hangs
Treat the grow as three placement regimes: seedlings want the high-and-dim hang (distance generous, dimmer low — tender tissue burns first); veg wants the chart's mid height at moderate power, encouraging spread; bloom wants the closest chart-approved distance at full power, with the weekly re-check tightened because stretch is fastest there. Write the three target distances on tape on the tent pole — turning the maker's chart into house rules ends the per-stage relitigating.