
Dim-when-hot is a thermal confession
Separate the two dimming stories first. A light that is equally dim from the first minute has an output problem — dimmer setting, driver fault, aged LEDs. A light that starts strong and fades over thirty to sixty minutes is thermal: junction efficiency dropping, or protection actively winding output back. The cold/hot comparison in step three makes the split objective instead of impressionistic.
Thermal faults stack rather than compete: a filter of dust on the heatsink raises temperature a little, the slowing fan raises it more, the light hung tight under a reflective tent roof recirculates its own exhaust, and the driver strapped flat against the hot housing derates on top. The sequence below peels the stack in the order of cheapest relief first — and most lights need only the first two layers.
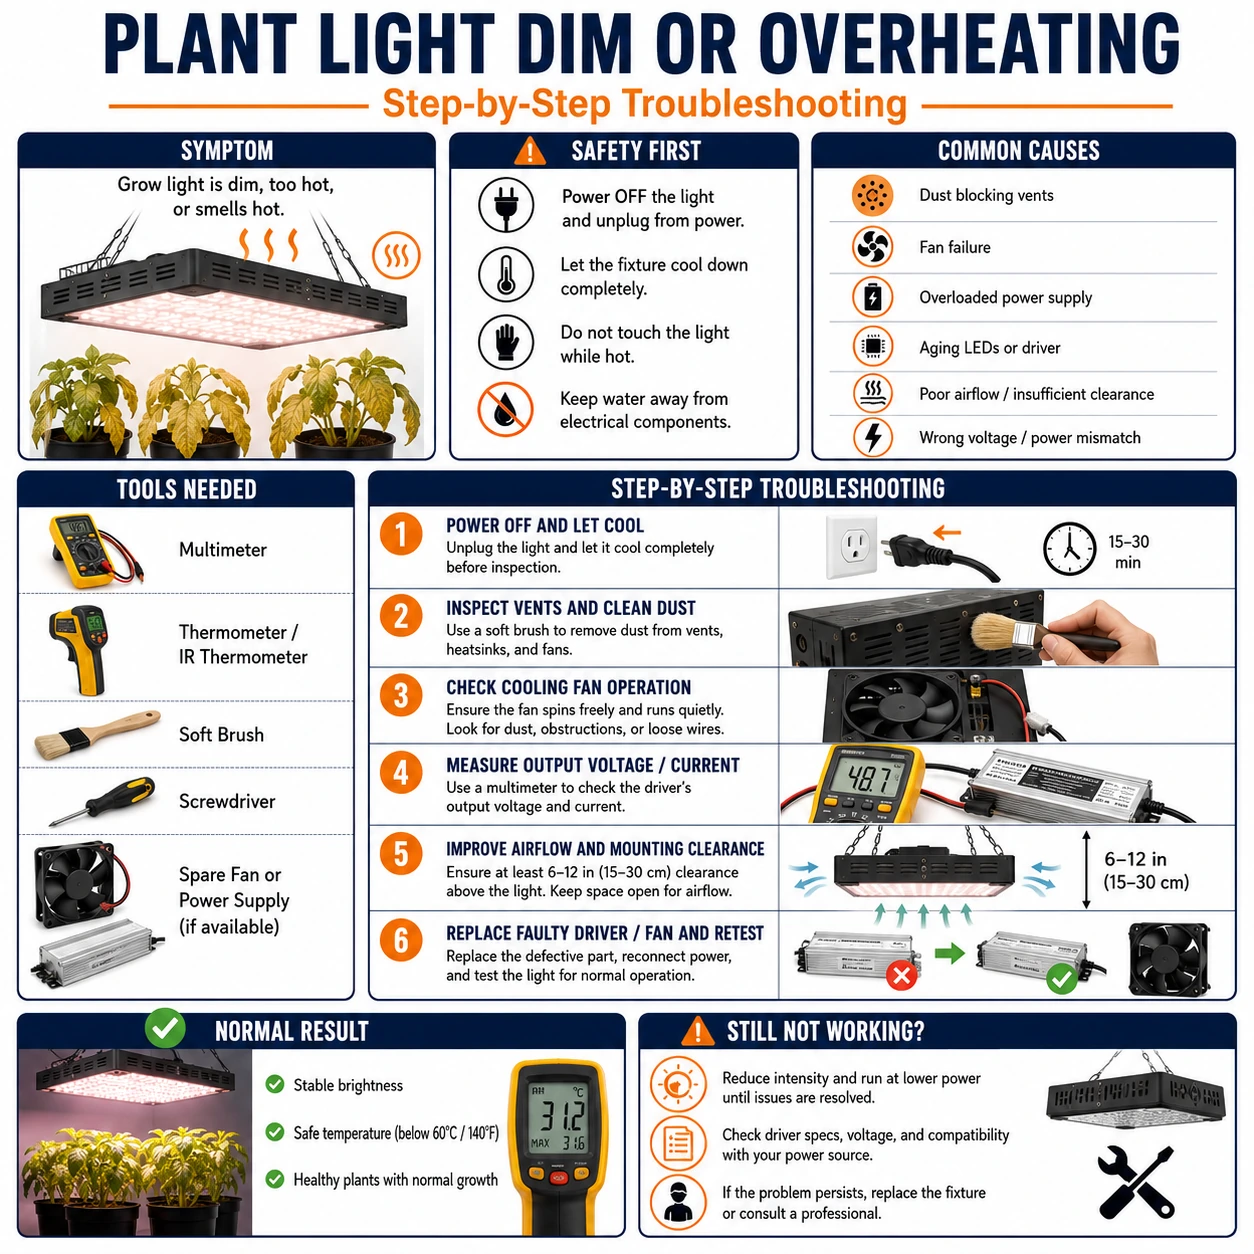
Prepare before testing
- Soft brush, vacuum and compressed air — dust felted into fins and fan grills is the primary suspect
- Phone camera with timestamps — photograph brightness cold and hot for an honest comparison
- Infrared thermometer (optional) — casing temperatures make derating visible without opening anything
- Plug-in power meter (optional) — watts falling as the light warms is derating caught in the act
Unplug and let the fixture cool before cleaning — fins and LED boards hold painful heat long after switch-off. Compressed air only with the fan blocked from spinning; free-spinning a fan with air can damage its bearing and board.
Check these areas first
- Dust-blocked heatsink or intake. a felt of dust is insulation exactly where the design wants airflow
- Failing or stalled fan. bearings dry out; a fan spinning at half speed cools at a fraction of spec
- No breathing room. canopy grown into the light, or the light tight under the tent roof, recycles hot exhaust
- Driver heat-soaked. drivers mounted on or above the hot fixture derate their output current to survive
- Aged interface or genuine LED decay. thermal paste dried under the board, or years of hard running — the residual case when cooling checks out
Diagnostic procedure
Clean first, verify moving parts second, measure the behavior third — the order most likely to end early with a cheap win.
Clean every fin, grill and intake
Unplugged and cool: brush and vacuum the heatsink fins, fan blades, intake mesh and the gap between board and sink. Work until metal shows clean along the full fin depth — a surface pass that leaves felt at the fin roots changes little. Note how much came off; a heavy harvest all but names the culprit.

Prove the fan actually runs at speed
Power up and watch or listen at the fan: it should spin promptly, smoothly and quietly. Grinding, chirping, a slow lazy spin, or a fan that starts only after a nudge means dying bearings. On temperature-controlled fans, warm the light and confirm the fan engages when heat arrives rather than never.

Compare brightness cold versus hot
From fully cold, photograph the canopy at switch-on with fixed camera settings, then again after an hour at the same settings. Obvious sag between the photos confirms thermal dimming; near-identical frames push the diagnosis toward settings, drivers or plain LED age instead of cooling. A power meter reading falling over the same hour is derating made numeric.

Check what the light breathes
Map the fixture's airflow path in place: intake side clear of the tent wall, exhaust not firing straight into the roof a hand-width away, no canopy leaf resting on the housing, ambient in the tent reasonable. Re-hang or re-duct until the light inhales cool air and its exhaust leaves the neighborhood instead of orbiting back.

Feel where the heat concentrates
With the light hot (and using an IR thermometer if available), compare zones: fins should be hot and roughly even. One furious hot patch with cool fins elsewhere suggests the board's thermal interface has failed under that zone. A driver housing too hot to rest a finger on, mounted flat on the fixture, is a candidate for remote mounting on a bracket in cooler air.

Judge what remains after cooling is fixed
Re-run the cold/hot comparison after cleaning, fan repair and re-hanging. Restored steadiness closes the case. Still sagging with proven airflow: a derating driver (replace matched, mount remote) or genuinely aged LEDs — grow diodes run hard for years do fade, and a board holding well under half its original punch has earned retirement to seedling duty.

The dedicated fan-fault branch
A fan that never turns is its own tight diagnosis. Unplug, then spin the blade by hand: a healthy fan glides, a seized one resists or grinds — replace it (fans are standard sizes; match dimensions, voltage and connector). If it spins freely but never runs powered, check its connector on the board first, then whether the fixture's fan is temperature-triggered and simply had not reached threshold — warm the light and listen for engagement. A free-spinning, connected, powered-but-silent fan means its drive circuit failed: on external-fan designs an inline replacement is trivial, while sealed designs turn this into a warranty conversation. Run no fan-cooled fixture fanless 'temporarily' — passive fins sized for assisted airflow cook boards fast.
The senses as early-warning instruments
A hot electronics smell — sweetish, sharp, unmistakable — or a new buzz from the driver zone outranks every scheduled check. Smell that appears once under a fresh dust layer and vanishes after cleaning was baking dust, and is closed. Smell from a clean fixture, discoloration around the driver, or buzzing that tracks brightness settings are driver distress: swap it matched before it takes the board along. Trust the nose over the spec sheet; it reports earlier.