
A totally dark strip is good news, diagnostically
A strip that is completely dark is easier to diagnose than one that misbehaves. Flicker, color errors and partial outages can have half a dozen overlapping causes, but zero light means the supply chain is broken at exactly one point: the outlet, the adapter, the DC connection, the controller, or the first few centimeters of the strip itself. Each of those points can be tested in under a minute.
Before starting, rule out the two trivial cases that resolve a large share of reports: a smart plug or wall switch upstream that is switched off, and a remote or app scene that has simply set brightness to zero. Turn brightness to full from the physical controller button if there is one, then begin the electrical checks below.
Prepare before testing
- Digital multimeter — set to DC voltage, 20 V range for 5/12 V systems or 200 V range if unsure
- Known-good adapter of the same voltage — the fastest way to condemn or clear the original supply
- Small flat screwdriver — for opening screw-terminal DC plugs and reseating wires
- Phone flashlight and magnifier — solder pads and hairline strip fractures are hard to see in place
Work only on the low-voltage side. If the adapter case is cracked, smells burnt, or the mains plug pins are loose, replace it — never open a sealed mains adapter to repair it.
Check these areas first
- Dead outlet or upstream switch. wall switches, smart plugs and power-strip switches silently cut strips more often than any component failure
- Failed adapter. electrolytic capacitors in cheap wall-warts dry out; the LED indicator on the adapter can still light while the output sags to nothing under load
- Loose or reversed DC barrel plug. barrel plugs pull loose under cable tension, and center-positive versus center-negative mix-ups kill output silently
- Controller with no output. a crashed or water-damaged controller can accept commands yet leave its output stage off
- Broken first joint on the strip. the solder joint where the lead wire meets the first pad carries all the current and is the most common break point on the strip itself
Diagnostic procedure
Follow the power path in order and take a reading at every point. Change nothing until a measurement tells you where the supply stops.
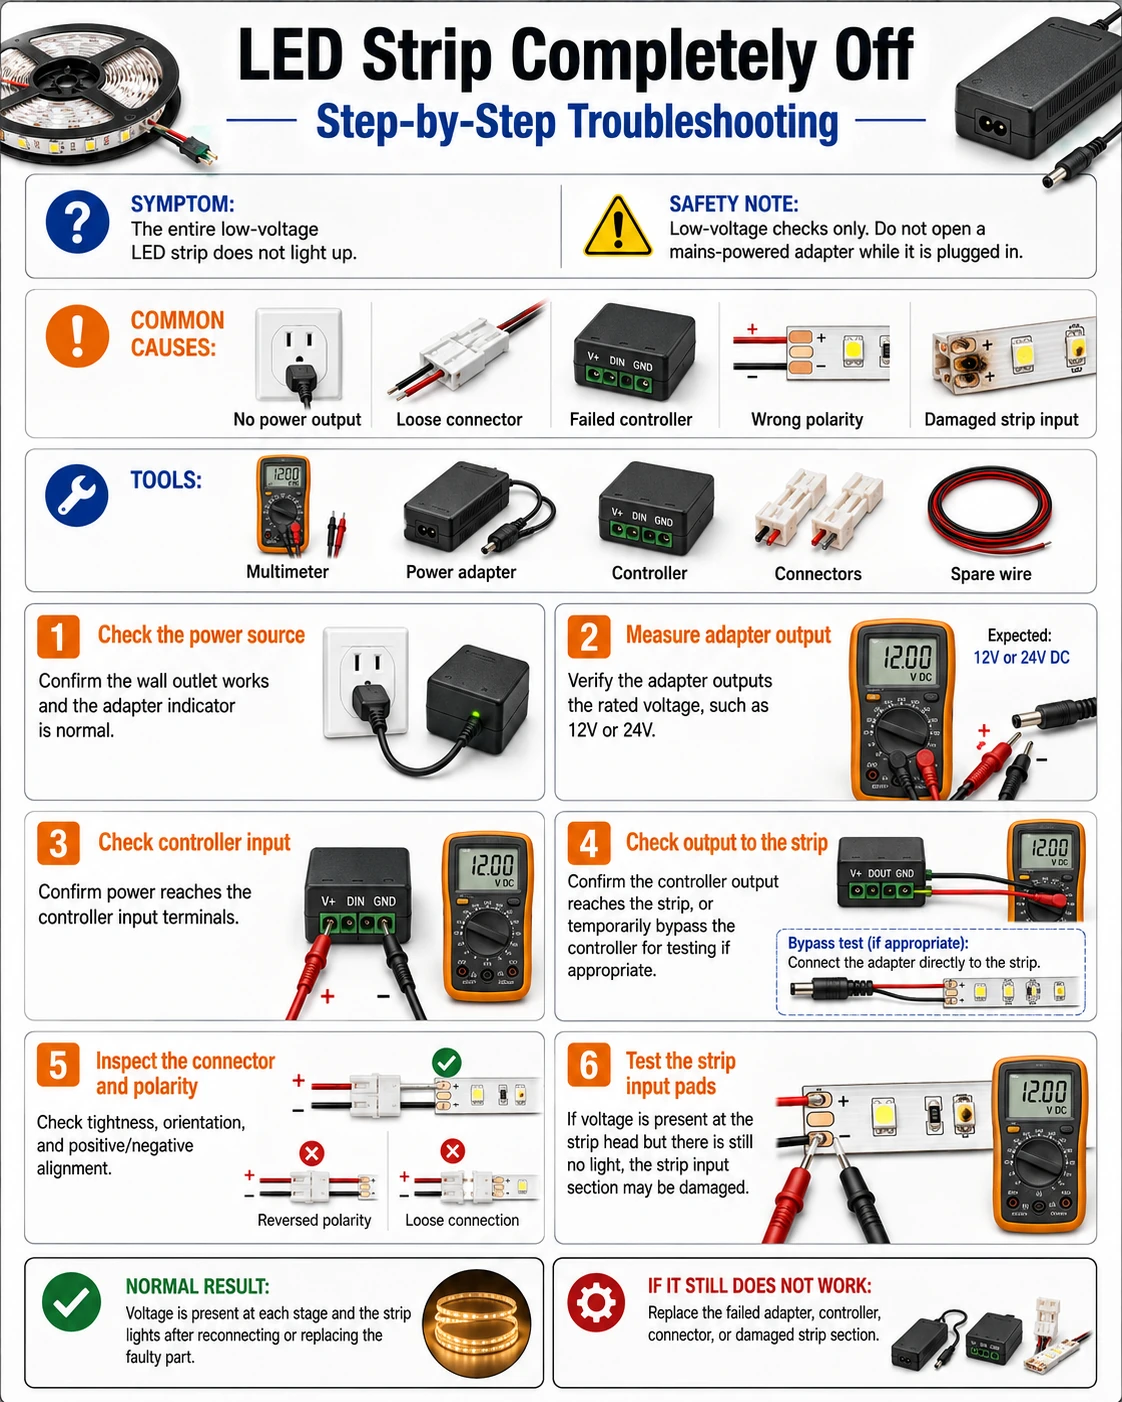
Confirm the outlet and adapter are getting power
Plug a phone charger or lamp into the same outlet to prove the socket is live, then check any wall switch, smart plug or power-strip switch feeding it. Look at the adapter itself: an indicator LED that is dark, or a unit that is stone cold after ten minutes, points at the supply.
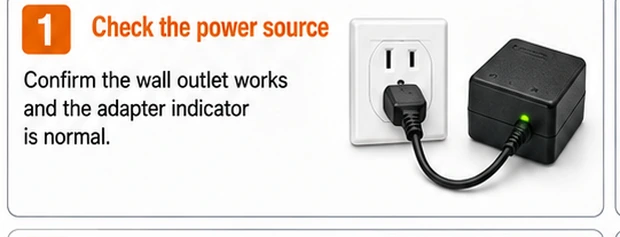
Read the adapter label and match the voltages
Find the output line on the adapter nameplate — typically 5 V, 12 V or 24 V DC. It must match the voltage printed on the strip and on the controller. A 12 V adapter on a 24 V strip produces little or no light and is a common outcome of reshuffled adapters after a house move.
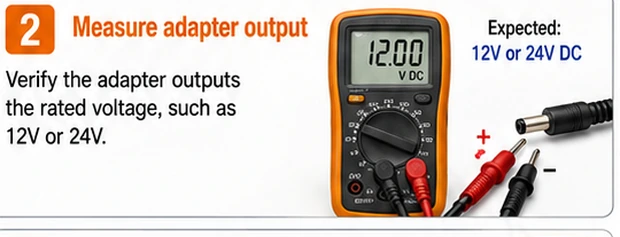
Measure the adapter output with a multimeter
Set the meter to DC volts. Red probe to the inner contact of the barrel plug, black to the outer sleeve. A healthy adapter reads within about five percent of its label. A reading of zero, or one that collapses when the strip is connected, condemns the adapter.
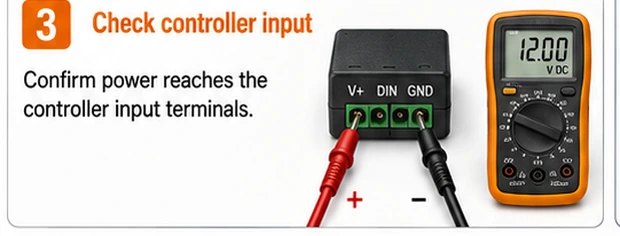
Measure at the controller input
If the adapter measures good, follow the voltage forward: probe the controller's input terminals or the far end of any extension lead. The same nameplate voltage should arrive here. If it does not, the fault is in the plug, an inline connector or the extension run — not in the adapter or controller.
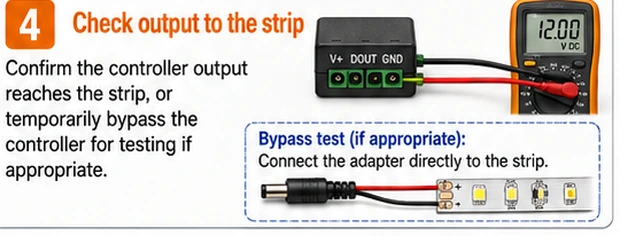
Check the controller output and the strip's first pads
Send an on command at full brightness, then measure the controller's output terminals. Output near supply voltage with a dark strip moves suspicion to the strip head: inspect the first solder pads for cracks, verify the connector clamps the copper pads and not the silicone coating, and confirm the arrow direction on addressable strips.
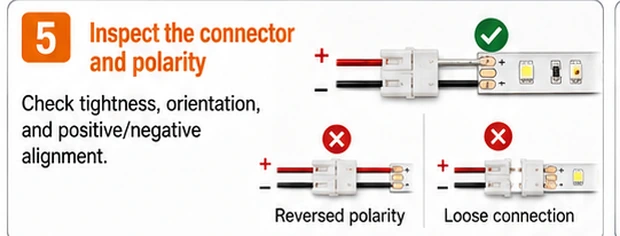
Swap one known-good part to confirm
Substitute exactly one component that matches the system voltage — first the adapter, then the controller if needed. If the strip lights with a borrowed adapter, the diagnosis is closed. Swap only one part per test; changing two at once is how a solved fault turns back into a mystery.
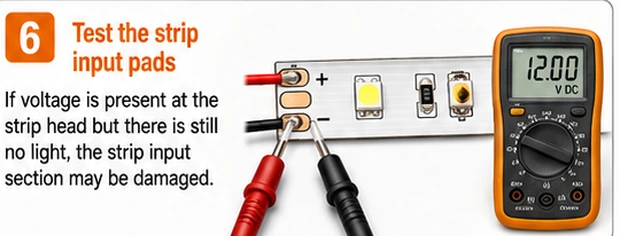
What is worth fixing on a dead system
Adapters are replaceable commodity parts: match voltage exactly, meet or exceed the current rating, and prefer a name-brand unit — the few euros saved on a no-name wall-wart are the most common reason this fault returns within a year. Controllers are usually cheaper to replace than to repair unless they are part of an addressable system with paired remotes.
A broken first joint on the strip is a genuine repair candidate: cut back to the next cut line and resolder the lead, or fit a solderless clip connector. If the strip has failed along its length rather than at the head, weigh the cost of a quality replacement against an afternoon of segment surgery.
Keep the next strip alive longer
Most premature strip deaths are heat and connector problems, not LED wear-out. Leave the adapter ventilated rather than buried under a carpet or in a sealed channel, keep barrel plugs strain-relieved so cable tension does not lever the joint open, and if the strip runs at full white for hours daily, choose an adapter rated at least thirty percent above the strip's calculated load.