
Same command, different color: one branch disagrees about wiring order
The controller sends identical channel signals to every branch of a zone; if one door renders them differently, that branch's conductors are meeting the signal in a different order — a rotated plug, a back-out pin, a mis-crimped extension, or occasionally a strip built with a different channel order than its siblings. Brightness is typically normal; only the mapping is shuffled.
A different beast wears similar clothes: a door that matches at low brightness but drifts pink or orange at full white is not mis-wired — it is starved. Voltage drop or a poor ground on that branch dims the blue channel first at high load. Step six separates the two so you do not rewire a branch that needed a better ground.
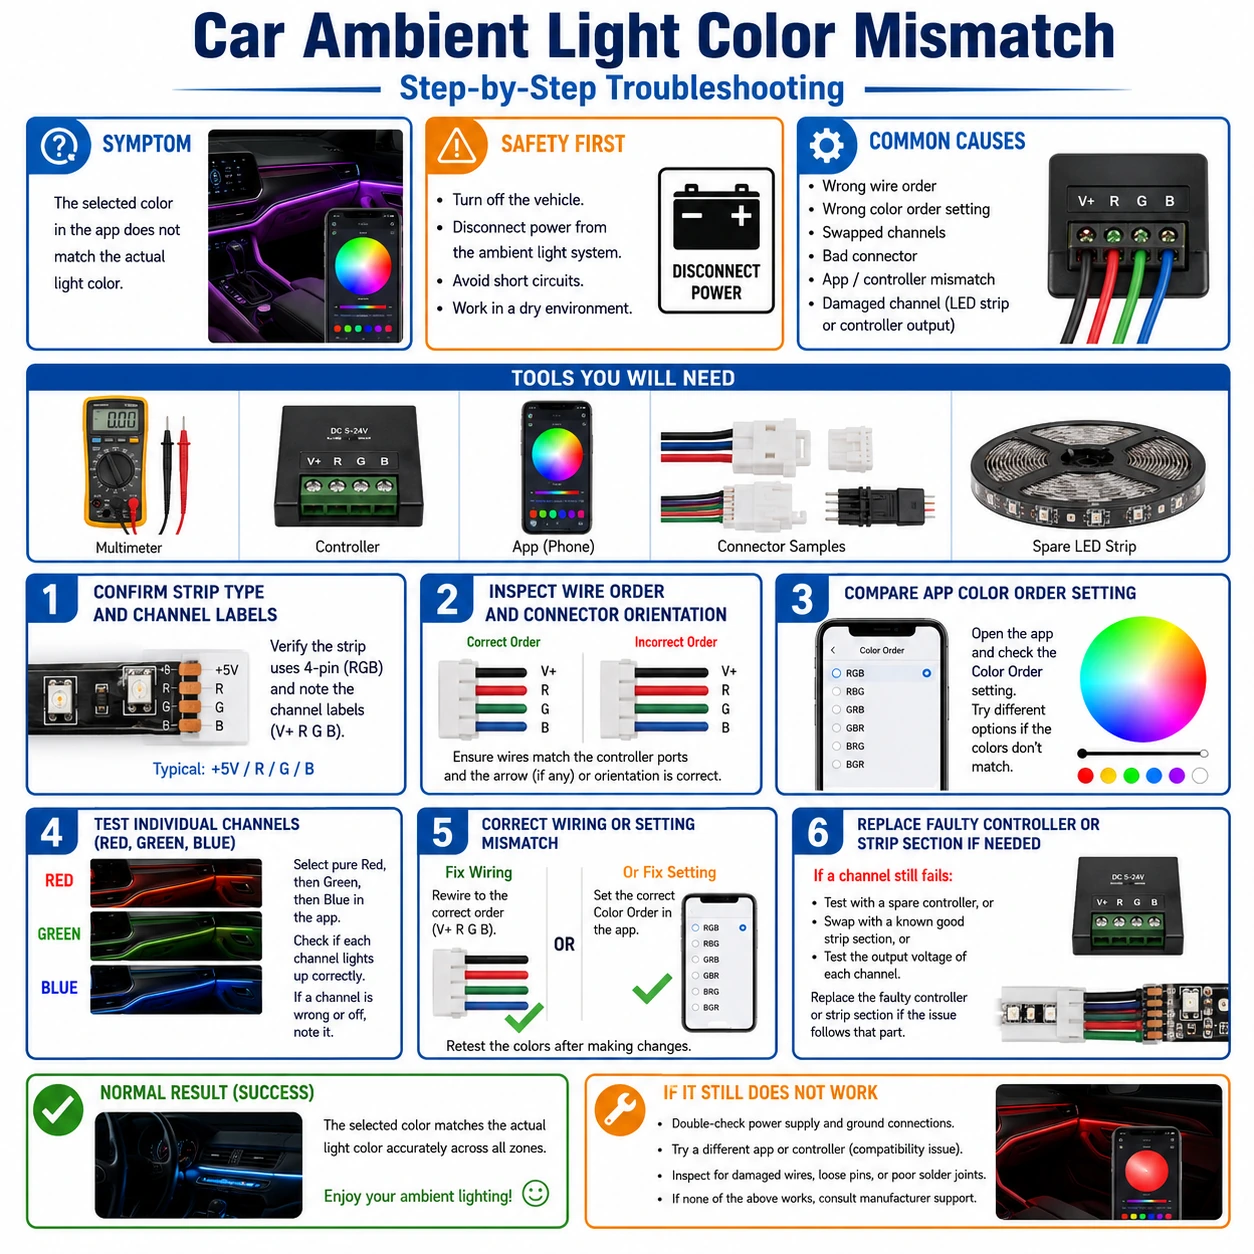
Prepare before testing
- The kit's app or remote — to command exact pure red, green, blue and full white
- Small screwdriver or pin tool — to release and re-seat crimped pins in branch connectors
- Multimeter — for the full-white voltage comparison in the last step
- Notebook or phone notes — a per-door mapping table is the entire diagnostic record
De-energize the kit (key off) before unplugging branch connectors, and never force a plug that resists — bent pins turn one shuffled zone into one dead zone.
Check these areas first
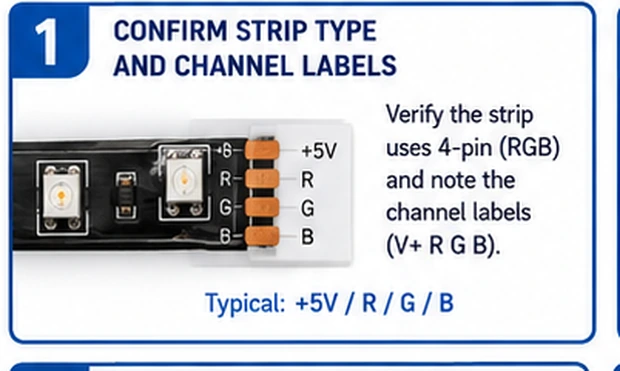
- Branch plug seated rotated or offset. multi-pin ambient plugs on some kits can engage one position off with enough enthusiasm
- Back-out or crossed pins. a crimped pin pushed out of its cavity, or two pins swapped during a previous repair
- Mismatched replacement strip. a door strip replaced with one wired G-R-B in an R-G-B system renders every command shuffled
- Controller port fault. rare, but a damaged output stage can drop one channel on one port — the swap test exposes it
- Voltage drop masquerading as tint. only at high brightness, one door warms in tone: supply sag, not wire order
Diagnostic procedure
Map first, localize second, repair third: three color tests build the map, one branch swap splits strip from controller, and the fix lands on a specific connector or setting.
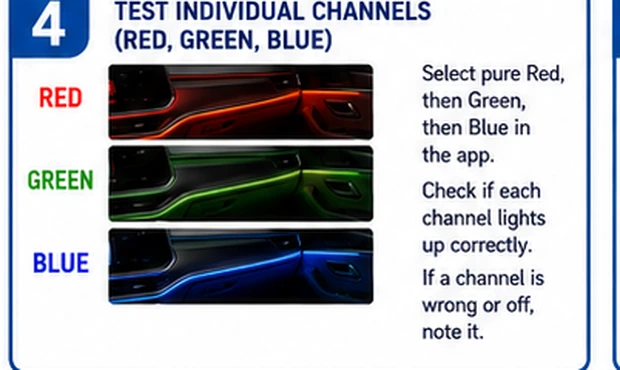
Command pure red and record every zone
Set the whole system to 100% red and walk the car, noting what each door and footwell actually shows. Consistent zones confirm the controller's command is good; the odd zone out displays whatever its wiring order makes of 'red'. Photograph the odd zone for the record.
Repeat with pure green, then pure blue
Two more passes complete the table. A branch showing R→G, G→B, B→R has its three channels rotated one position; R and G swapped with B correct means exactly two conductors crossed. The pattern predicts precisely what you will find at the connector, before you open anything.
Swap the odd branch onto a known-good port
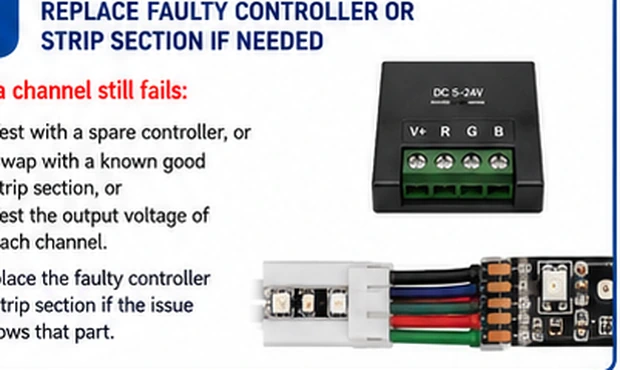
Key off, unplug the mismatched door's branch and a neighboring correct one, and exchange ports. If the problem follows the branch to the new port, the branch (its plug, extension or strip) is guilty. If the problem stays with the port, the controller output is — and no amount of connector work will fix it.
Inspect the guilty connector's pins
Under good light, compare the odd branch's plug against a correct sibling: look for a pin sitting deeper than its neighbors (back-out), pins in swapped cavities, or corrosion on one contact. Re-seat backed-out pins until they click; move crossed pins to the cavities matching the good plug's layout.
Correct the order in settings or at the terminals
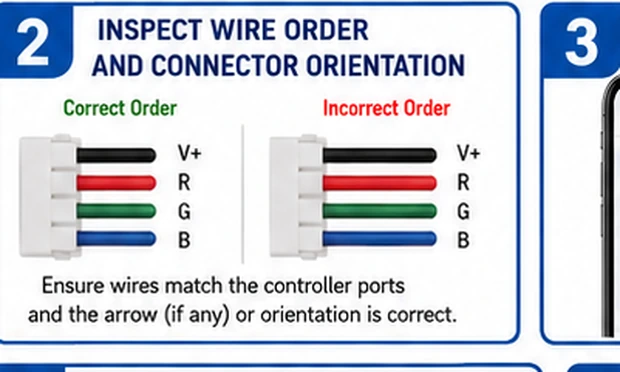
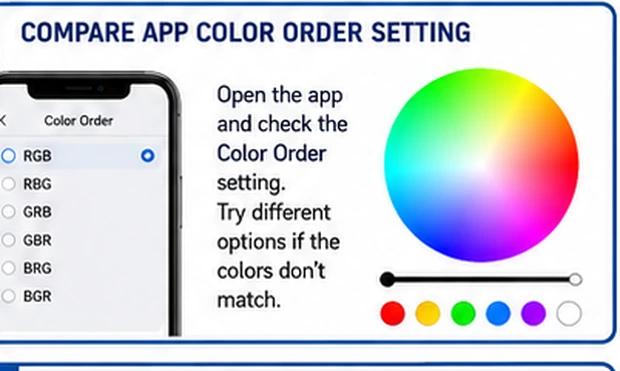
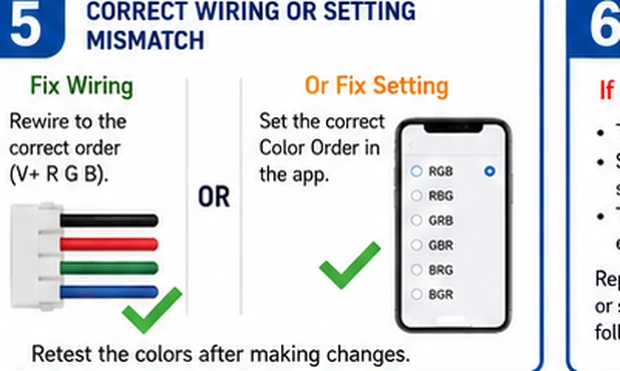
If hardware looks right, check whether the app supports per-zone channel-order or calibration settings and step them until red is red. Failing that, key off and re-order the branch's conductors at its terminal block to match a correct door, one wire at a time against your mapping table.
Compare all zones at full white
Finish with 100% white across the car. Uniform white closes the case. One door tinted warm or dim at full white only is a load problem: measure that branch's voltage at the strip end against a healthy door — more than a few tenths lower means its feed or ground needs attention, not its wiring order.
Why one door was different in the first place
Mismatches that appear after a repair almost always trace to a replacement strip from a different production run or vendor — same plug, different internal channel order. When replacing any single door's strip, buy the maker's exact part or be prepared to re-pin the plug against your mapping table. And after any door-panel service, the first test worth running is thirty seconds of pure red: it catches a rotated reconnection before the trim screws are even back in.