
Dark ambient lighting is a supply-side fault until proven otherwise
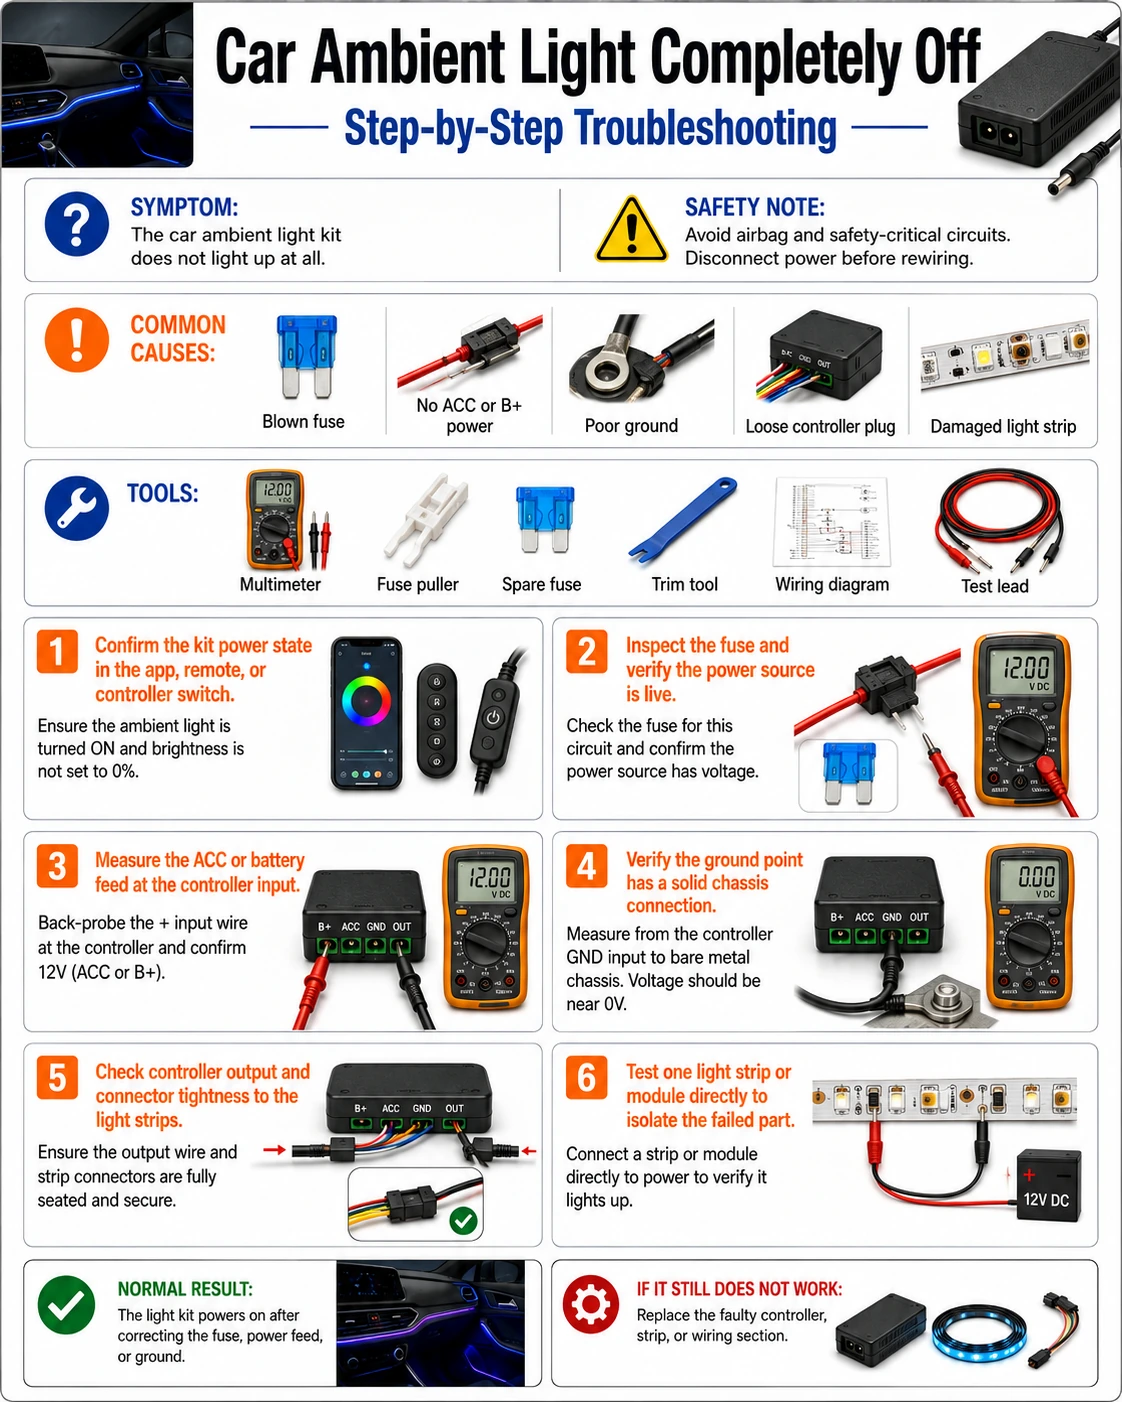
A completely dark system rarely means dead LED strips — dozens of LEDs across separate door branches do not fail together. What fails together is what they share: the inline fuse, the ACC-switched feed, the single chassis ground, or the controller that everything plugs into. The six steps below walk those shared points from cheapest to most involved.
First, establish what 'on' should look like. Most kits power from an ACC circuit, so lights should respond with the key at ACC without the engine running; some tap always-hot circuits and are controlled purely by the app. Thirty seconds of checking behavior at each key position — off, ACC, running — tells you which design you have and whether the fault is real or a misunderstanding of when the kit is supposed to light.
Prepare before testing
- Digital multimeter — DC 20 V range; the whole diagnosis is five voltage and continuity readings
- Fuse puller and spare fuses of the same rating — blade fuses hide fatigue cracks that survive a visual check
- Trim removal tool — to reach the controller and ground point without snapping clips
- Phone flashlight — ground bolts and fuse boxes live in dark footwells
Work with the vehicle off except during voltage-state tests. Never enlarge a fuse to 'fix' repeated blowing, and keep wiring clear of pedals, airbag modules and seat rails.
Check these areas first
- Blown or fatigued inline fuse. the kit's own blade fuse near the power tap fails first and costs nothing to check
- Lost ACC feed. fuse-tap adapters vibrate loose, and some fuse positions go dead after a battery change or fuse-box service
- Failed chassis ground. one ring terminal on paint, rust, or a loosened bolt takes the entire system down
- Controller failure or crashed firmware. input voltage present with zero output and no app response points here
- A shorted door branch dragging the system down. one pinched harness at a hinge can pull the shared supply low enough that nothing lights
Diagnostic procedure
Follow the current path in order — key state, fuse, controller input, ground, connectors, then branch isolation. Each step either clears a shared component or convicts it.
Check behavior at each key position
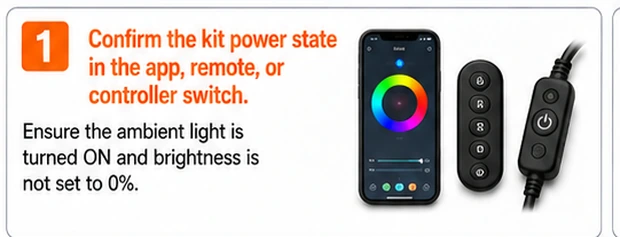
Observe the lights with the car off, at ACC, and with the engine running. A kit that lights only when running is tapped to an ignition-switched circuit; one that never lights in any state has a true supply fault. Also try the app during each state — a controller that appears in Bluetooth only at ACC narrows the feed question immediately.
Pull and test the kit's fuse
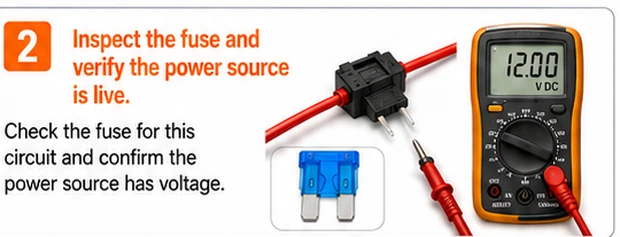
Find the inline fuse near the power tap point, pull it with the circuit dead, and check it on the meter's continuity setting rather than by eye — vibration cracks the element invisibly at the ends. Replace only with the same rating; a bigger fuse converts the next fault into melted wiring.
Measure voltage at the controller input
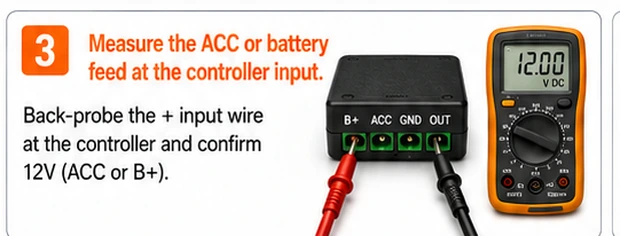
At ACC, meter the controller's power input: red probe to the supply pin, black to a known-good bare-metal point. Expect roughly 12–12.6 V engine-off. Zero volts convicts the feed between the fuse box and the controller; full voltage with no life moves suspicion to ground or the controller itself.
Inspect the chassis ground point
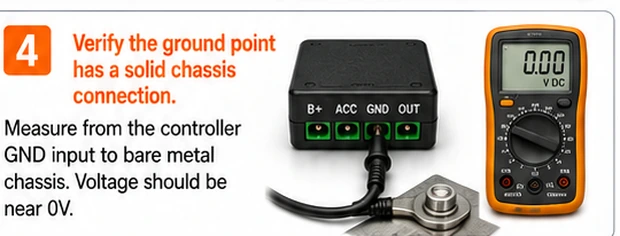
Find the kit's ring terminal on its body bolt. Look for a crimp on painted metal, rust bloom, or a bolt that turns by hand. Measure resistance from the terminal to bare chassis metal: it should be near zero ohms. Clean the contact patch to bright metal and retighten if anything is doubtful.
Reseat every connector in the chain
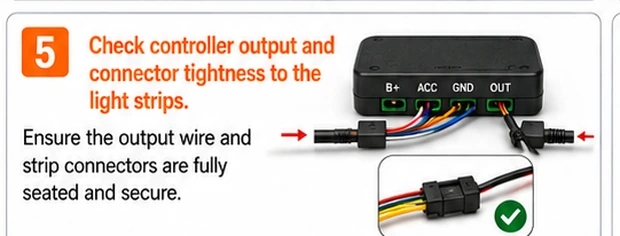
With power off, unplug and reinsert the controller's main power plug, the data plug, and each door-branch connector. Check pins for back-out — a pin pushed out of its housing seats the plug perfectly while connecting nothing — and for a plug forced in rotated. Reconnect, power up at ACC, and test.
Isolate the controller from its branches
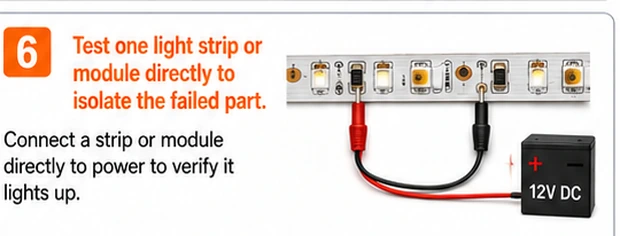
Disconnect every branch so only the controller is powered, then test. If the controller now responds, reconnect branches one at a time until the system dies again — the branch that kills it is shorted, usually at a door hinge or trim screw. If the controller stays dead alone with good input and ground, the controller has failed.
Flickers or cuts out at engine start
Lights that blink or reset exactly at cranking are reacting to the normal voltage dip when the starter draws its surge — system voltage can fall toward 9–10 V for half a second. A kit that resets there has either a marginal connection amplifying the dip, or a controller with no ride-through. Tighten the ground and feed first; if the behavior continues on a healthy supply, power the kit from an ACC position that energizes after start, so the controller simply boots after the dip instead of living through it.
Stays on after the car is off
Ambient lights that keep burning after shutdown mean the kit is fed from an always-hot circuit rather than a switched one. Some kits are designed this way and rely on the app's timer; if yours is not, or the battery protests, move the fuse tap to a position that dies with the key — verified with the meter across the candidate fuse in both key states. A parasitic-draw variant: a controller that turns its LEDs off but keeps radios awake can flatten a battery over a long airport week; a hard-switched feed ends that too.
Only one door or zone is dark
With the rest of the system healthy, a single dark door is that branch's harness or connector — the wiring crosses the door jamb and flexes at every open-close cycle. Unplug the dead branch and swap it onto a neighboring port: if the door lights on the new port, the controller's original output has failed; if it stays dark, the branch harness is broken, almost always within a hand's width of the hinge boot. Repair with a soldered, heat-shrunk splice and re-route slack so the loop flexes over its whole length rather than kinking at one spot.
Closing out an automotive kit fault
Fuse, feed and ground faults are permanent fixes once done properly — clean metal, tight crimps, correct ratings. Controllers are sealed commodity parts: replace rather than open, and note the model so the replacement speaks to the same app and strips. A branch harness that has already cracked once at a hinge will crack again unless the routing changes; add a service loop, and the repair outlives the car's next owner.